How to add depth of field to your photography
Depth of field is one of the most used photography techniques which result in a nice photography. The depth of field is given by the objective and the lenses. However if you use the automatic mode on your camera and the image looks flatten and without any depth effect then you can improve the photography using the software.
Definition of the depth of field could be said as “the distance between the nearest and farthest objects in a scene that appear acceptably sharp in an image.“ If you are beginner, I highly recommend the detailed description and definition of the Depth of field on the Wikipedia website where I borrowed the definition from.
For now, I have a short tutorial describing how to add depth of field to your photography using the Corel PaintShop Photo Pro X3. It is nice photo editing software with three modes responding to beginners, intermediates and professional user needs. One of its adjustments is called Depth of field and adds the needed look to your photography.
How to correct low depth of field using the PaintShop Pro X3
So, at first, open the PaintShop Pro Photo X3, go to the Organizer mode and find a photo which would you like to edit. Double click on it – it should open in the full editor mode.
Click the Adjust >> Depth of field function. The new window will appear.
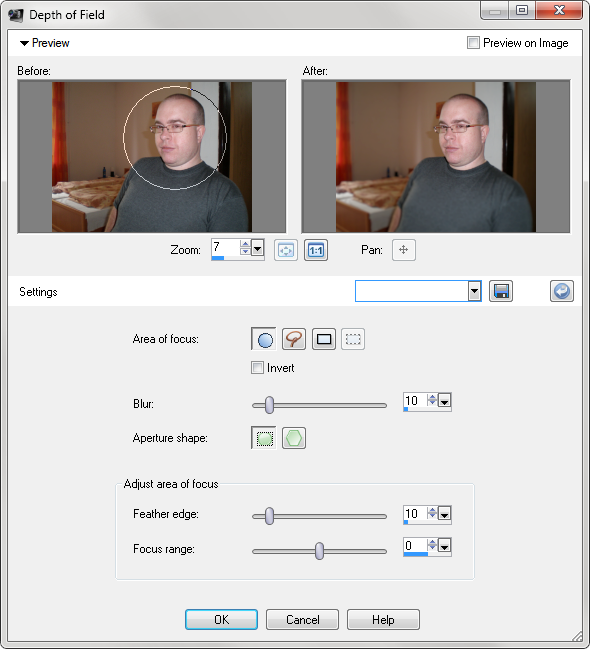
Adjusting the low depth of field using the Corel PaintShop Photo Pro X3
In the new window, drag your mouse from the center of the area which should stay sharp. For example, I had drag from the nose of the face on my photography.
Then, try the differences between the two offered Aperture shapes. It depend on the kind of your photography what will be better.
Based on my experience, I recommend changing the default Blur value from the 20 to the 10 or lowest to get the realistic result. You can maximize the window to see bigger previews or enable the Preview on Image option to see the result on the source photography in main window.
That’s all. Click the OK button and you are done. Then you can use another functions of the PaintShop Pro and save the photography.
A small notice for the users of the older versions of PSP: The Depth of Field functions was called Clarify before the PaintShop Pro Photo X3.

