Insect Photography - 3 Important Tips
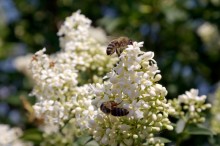
Insect macro photography is one of my favorite because there are an almost infinite number of willing subjects at my disposal and that they look so far out when shot up close. I never get tired of busting out my macro lens and capturing the eyes and wings of an insect. It puts the world of the insect into perspective.

credit: Jan Polzer
Tip One: Cooling bugs
We all know that part of the challenge of macro photography is the thin DOF. Gaining a proper DOF and composition is even harder when your subject is moving. One quick way that is not lethal is capturing the insect and cooling them in the fridge or freezer. It is all about finding the right opportunity to get the insect to slow down to the point where you can capture it. Their size and heft determines the length of time that they will be cooled. Smaller delicate ones like damselflies will take a much shorter time than larger, solid insects like dragonflies. As a rule of thumb, I usually put the bug in a jar or small Tupperware container and then use the following time guidelines.
-
Delicate insects: 1 minute (ants, crane flies)
-
Medium insects: 3 minutes (shield bugs, ladybugs, large spiders)
-
Large insects: 5 minutes (praying mantises, bumblebees, grass hoppers)
Pop open the fridge and inspect the insect at each time interval. They aren't even close if they are still walking around and moving. They are getting there if they are still, but hanging to the side of the container. The time is just perfect when they are not dead, very still and aren't clinging to anything. On the other hand there are some insects that can skip the cooling process because they are slow or don't fly. These bugs are highly recommended to start practicing on. For example, ladybugs, and shield bugs are some of the local insects I find less difficult to shoot.

credit: Jan Polzer
Tip Two: Controlling Your Background
The pros of shooting macro is that you can shoot almost every subject and have a blurred background. One technique that I find helpful with my shots is to take one or several bugs and place them on a stick in a vase. The vase should then be placed behind a white colored background. This way you can rotate the vase while keeping the camera fixed on a tripod. This creates many different shots of multiple bugs without having to move your camera.
Tip Three: DOF, Focus, and Bug Wrangling
One of the most captivating aspects of a bug macro shot is its eyes. However, in order to capture them, the bug must be facing you and the camera directly. This can be done by gently nudging the bug with a chop stick or any other long and thin rod. Keep in mind that it is imperative to have the bug properly cooled before doing this.


