Adobe Lightroom 3 and geotagging: step by step how-to
The new version of great photo organizer and editor Adobe Lightroom 3 still lacks geotagging support. It should be able to work with images already containing GPS information, but you do not have any chance how to set them. But there is one third party and free solution at least: special plugin for Lightroom 3 with geotagging features.
At the beginning you may ask a question: why to do the things like geotagging? What is this good for? Well, it’s like any other tagging. It could help you to filter your photos. But it is also great fun. For example, I use geotag information in my photos to show them on the map when viewing them on my iPad. You will see pins on places, where the photos have been taken and you can tap them and view them.
Geotagging could be relatively very easy. All you need to have is a GPS enabled camera or GPS navigation with recording feature. Personally, I use Android application My Tracks on HTC Hero whenever I go out to make some photos. The GPS recording result to GPX files which can be imported to the photo applications for geotagging. There are also special GPS recorders you can use as the keychain. Their data are copied via USB to the computer.
How to do geotagging in Adobe Lightroom 3
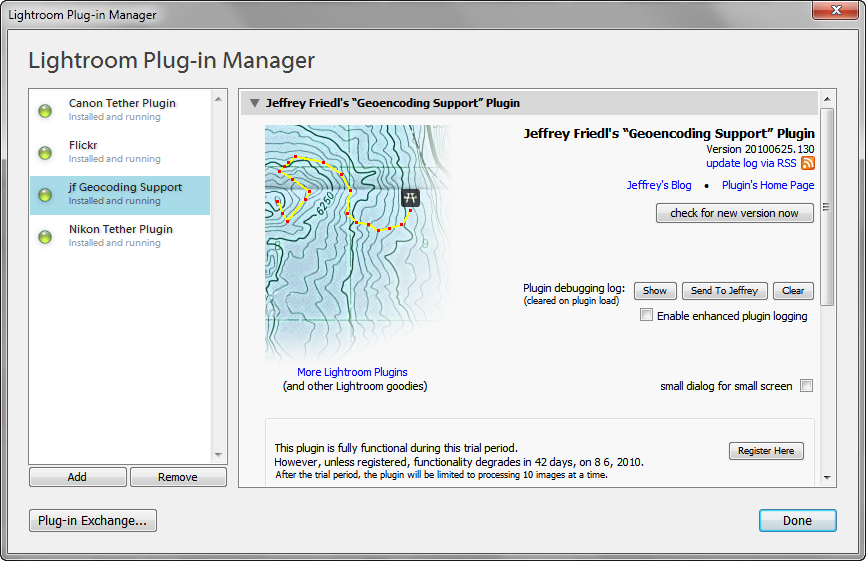
So, because the Adobe Lightroom 3 doesn’t support geotagging natively, download the special plugin, Jeffrey’s “GPS-Support” Geoencoding Plugin for Lightroom. Unpack it somewhere, so you will have a folder named gps-jfriedl.lrplugin. Run the Lightroom and go to the File > Plug-in manager menu. Click the Add button and select the folder gps-jfriedl.lrplugin.
The Lightroom 3 will tell you that the catalog has to be updated, which should take a few seconds. Then the plugin will be installed and enabled for use.
Adobe Lightroom 3 geotagging
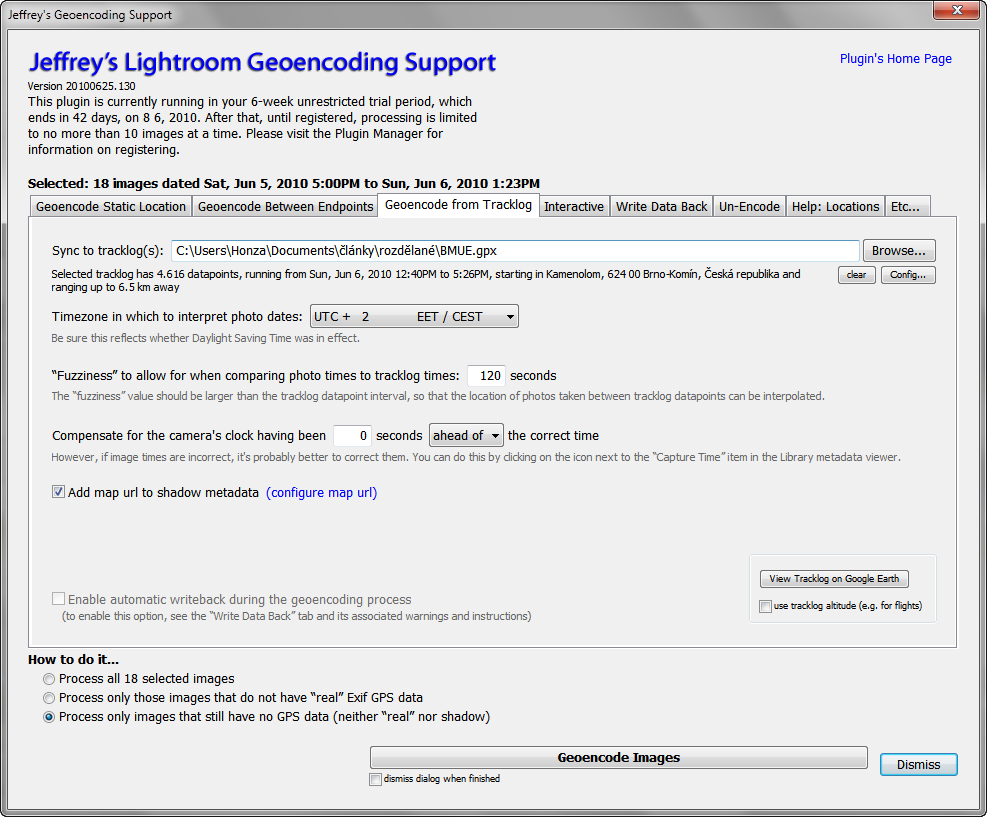
Go to the Lightroom’s Library mode, select the photos you would like to geotag and click the menu File > Plug-in Extras > Geoencode. Go to the Geoencode from Tacklog tab and click the Browse button. Select your tracklog exported from GPS and confirm. Now you should see information about the track, where is started and how long it was.
Adobe Lightroom 3 geotagging
Now, check the How to do it… section at the bottom. Select one of the three possible options, which tells you have the GPS information will be used. Continue with the Geoencode Images button. Well, you are done.
Geotagging without GPS tracklog
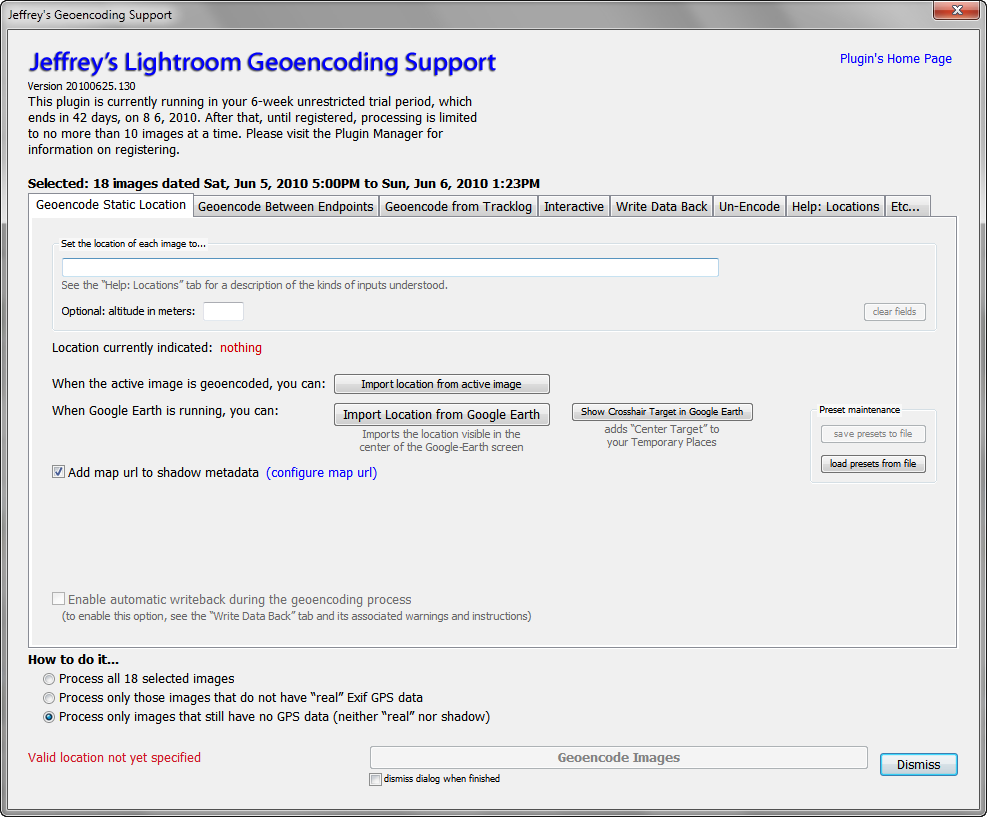
Jeffrey’s “GPS-Support” Geoencoding Plugin for Lightroom also supports manual geotagging. The first tab in its window, Geoencode Static Location, gives you the possibility to set up the place where the photo was taken manually. Use raw latitude and longitude separated by comma.
Adobe Lightroom 3 geotagging
There are several other features which this geotagging plugin for Adobe Lightroom 3 (and Lightroom 2 too) offers. I like Interactive On-By-OneGeoencoding on the Interactive tab.

Adobe Lightroom 3 geotagging
How to work with geotag information in Lightroom
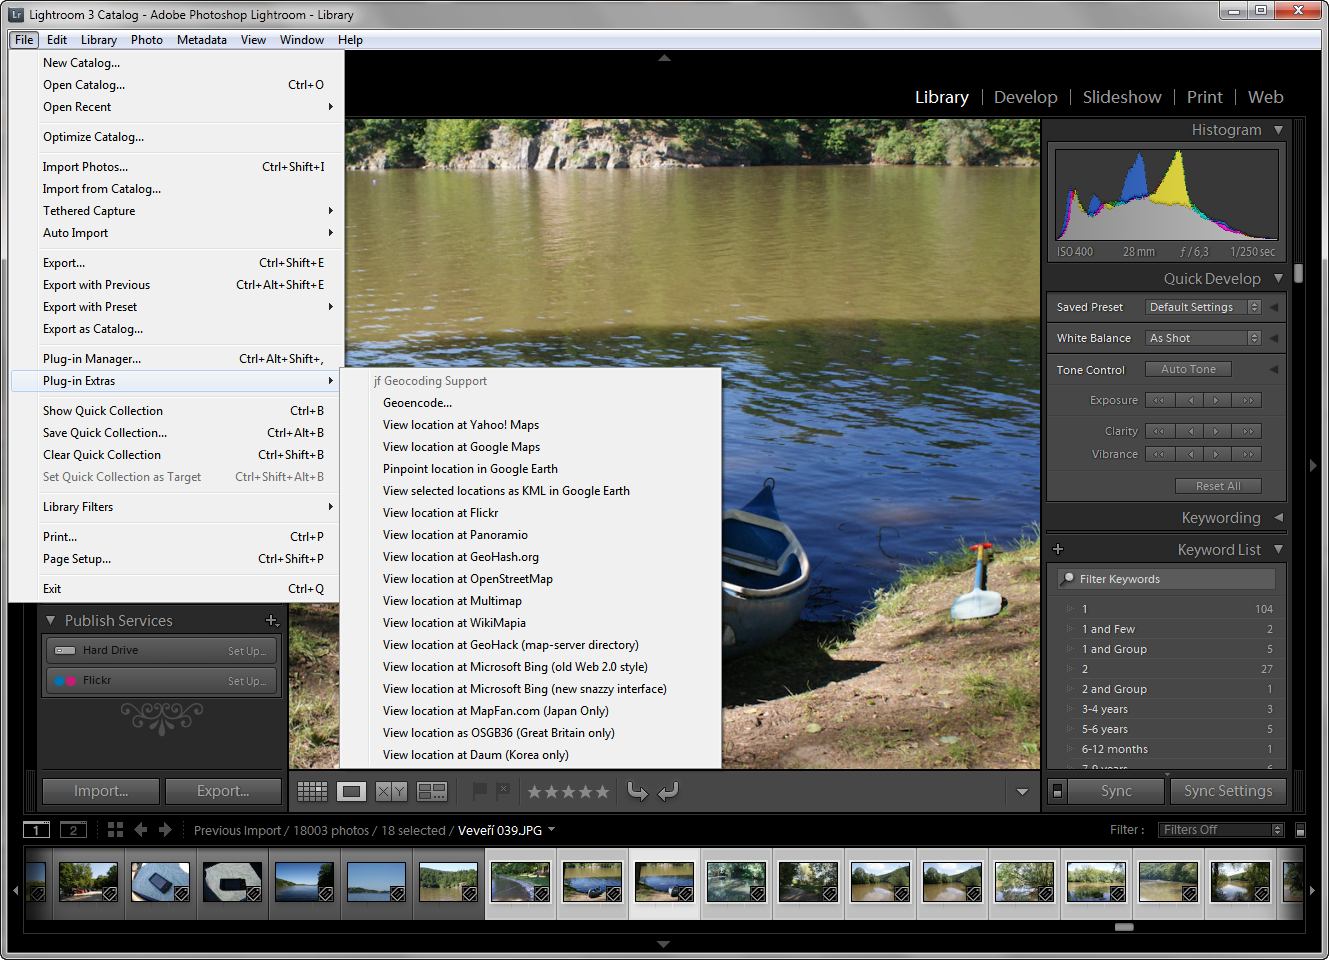
After the geoencoding is done we could start using it to view the photos. Check the File > Plug-in Extras menu to view selected photos positions in many online maps. I prefer Google Maps, but you can also try the rest. The Flickr is supported too for example.
Adobe Lightroom 3 geotagging
I hope you will find this short geotagging introduction to the Adobe Lightroom 3 useful and will start using the GPS with your photos. The plugin described here is a donationware. It will work for six week without registration, after that trial period only 10 images can be processed at a time. The registration is done via the PayPal and the money amount is up to you.

