20 tips for winter photography
Some say winter photography is the most difficult season to photograph. And that could be because of the difficulty with light, shadows and reflections in an all white landscape. But winter is a season you can get out and about and capture the magic of a winter wonderland. So if you need inspiration to get out in the cold here are 20 tips to help you get great winter photos.
Winter Mode
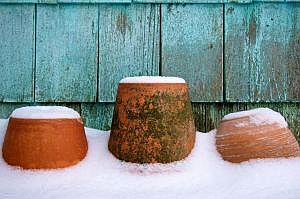
The snow's reflection can vary from between 40 to 50 percent in dirty snow, and up to 90 percent in freshly fallen snow. Reflection can even be higher if the snow is falling and still wet. Meter your light to get the best winter photos and spend time experimenting to find out what works best for you. Most cameras have a winter or snow setting that automatically balances the camera's auto white balance calculation and the exposure Is lowered to prevent overexposure. Many photographers prefer to meter their light and adjust their aperture settings and shutter speed manually to take more creative winter photos.
Manually Adjust your Camera Settings
Digital cameras have automatic settings so you can adjust its settings to get great winter photos even when the sky is as white as the snow. Some cameras use icons such as a cloud in front of the sun, and others use an ISO numbering system which measures the camera's sensitivity to light. The following are some tips on the settings to use in what conditions:
a. use an ISO of between 100 to 200 on sunny winter days
b. use an ISO of between 200 to 400 on cloudy winter days
c. use an ISO of between 400 to 800 at twilight
Do not use an ISO higher than 800 or the results will be a grainy look to the photo and make it look odd. Here are some how to tips for working with winter settings:
1. When working in pure white, fresh snow that has little detail, spot meter the snow's pure white areas and open up the aperture two stops.
2. When working in snow that is side lit and shows a lot of detail then the snow is not pure white. Open up your aperture 11/3 to 1½ stops.
3. If you are working on a sunny day and the snow has many shadows, experiment with opening your aperture increments to up to one stop.
4. Meter the snow on an overcast day and open the aperture up 2½ stops.
5. If you are still getting unsatisfactory results set your shutter speed in half increments and take some shots as a test until you get the result you want.
How to get a Great Winter Photo
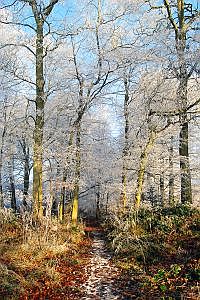
Be careful of shadows when taking winter photos. Everything is white - the sky, the snow and you need to watch where you are standing in relation to the main subject of the photo. In winter photography the age old belief to have the sun behind you may not be the best advice when taking photos in the snow. The ideal situation is to have the sun in the east when you are facing south as it will make the snow look realistic rather than a simple, blank white.
Adjust your Attitude
Sure we would all rather be curled up in front of the fire in winter and if this is how you feel, then this is the attitude your photos will reflect. Getting excited about the beauty of winter and meeting the challenges an all white landscape throws up to even the most experienced photographer, will be reflected in the photos you take.
Protect your Camera during Winter
Keep your camera as warm as possible while out in winter weather as cold batteries can cause all sorts of problems. Try to use alkaline batteries and make sure you have an extra set stored in a warm place just in case. Put your camera into a zip lock bag if it is snowing, and cut a hole for the viewfinder and the camera's lens. You may have to hold the bag in place with a rubber band. Do not blow snow off your lens, brush it off to avoid it freezing on your lens. The other thing is try not to breathe on the viewfinder through your nose while taking photos as it is likely to ice up the condensation on your viewfinder.
Recognize the Opportunities
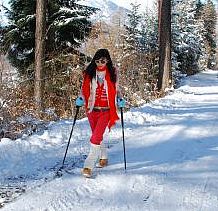
Winter is a truly special time of year to photograph and offers a complete uniqueness from the other seasons. There are unusual designs and textures caused by the whiteness, and it may be that you find a waterfall has frozen as it falls over an icy ledge.
General Tips for Winter Photographers
1. During winter the sky seems to be constantly gray so used a graduated filter on your lens to give the sky some color and the foreground will be left natural.
2. Use a fill flash to photograph wildlife in the snow to reduce the contrast in your photo.
3. Remember, early sunlight and late afternoon light can give unique photographic opportunities because of the color and reflections at this time of day.
4. Use the moonlight for night photography in the winter. You can get some amazing winter photos using the moonlight reflected from the snow.
5. Reduce the amount of white sky in your photos take the photos from a higher position, looking down on the subject.
6. Use a slow shutter speed if you want to capture wildlife while it is snowing, but be aware that this takes experimentation to get a good effect.
7. Check the landscape out from lots of positions. Look for contrasting objects and lines that will add interest and drama to your winter photography.
8. Get prepared the night before you are going to shoot winter photos. Everything is much harder when you are dressed for outdoors in the snow.
9. Protect yourself while out in the snow and make sure you are well-prepared to avoid hypothermia. And, tell someone where you are going.
These tips should give you some ideas to help you get better winter photos. There are many different ways to get good winter photos and it can be a matter of experimenting to find which method works best for you.
Note: this article was first published at 2009-02-23.

