Black and White Photography: How To Give Your Photographs An Eclectic Look With Photoshop and Lightroom
Black and white photography always had a certain je ne sais quoi, it speaks differently to the viewer – the lack of colors is compensated by the depth of the subject and by the way shadows and light build the entire image. In other words, if color photography is easily valued through its… colors, with black and white images it is a lot harder to send out the right message – one has to be a lot careful with composition, subject positioning, lightning and so on.
The same is true when post-processing an image. When postprocessing an image, one is generally in the lookout for enhancing colors in certain areas to bring out the best of that specific corner. Truth be told, you do the same when you want to enhance your black and white photography, you just have to be a bit more careful with what you want to bring out, because now you will not have the ability to differentiate areas using different colors, but different shades of gray – which obviously makes things a bit more difficult.
Regardless, this short tutorial will show you precisely how to go from a color landscape to a beautiful, vintage, black and white landscape that will still bring out the best out of your picture. For this tutorial I will be using Adobe Photoshop CS2 and Adobe Lightroom 2. I could only use Adobe Lightroom, but I want to show you how to selectively desaturate your image in CS2 (and later versions) since you might find it more useful along the way (you can do this in Lightroom too, but I just want to use both apps today)
Black and white photography in Adobe Photoshop
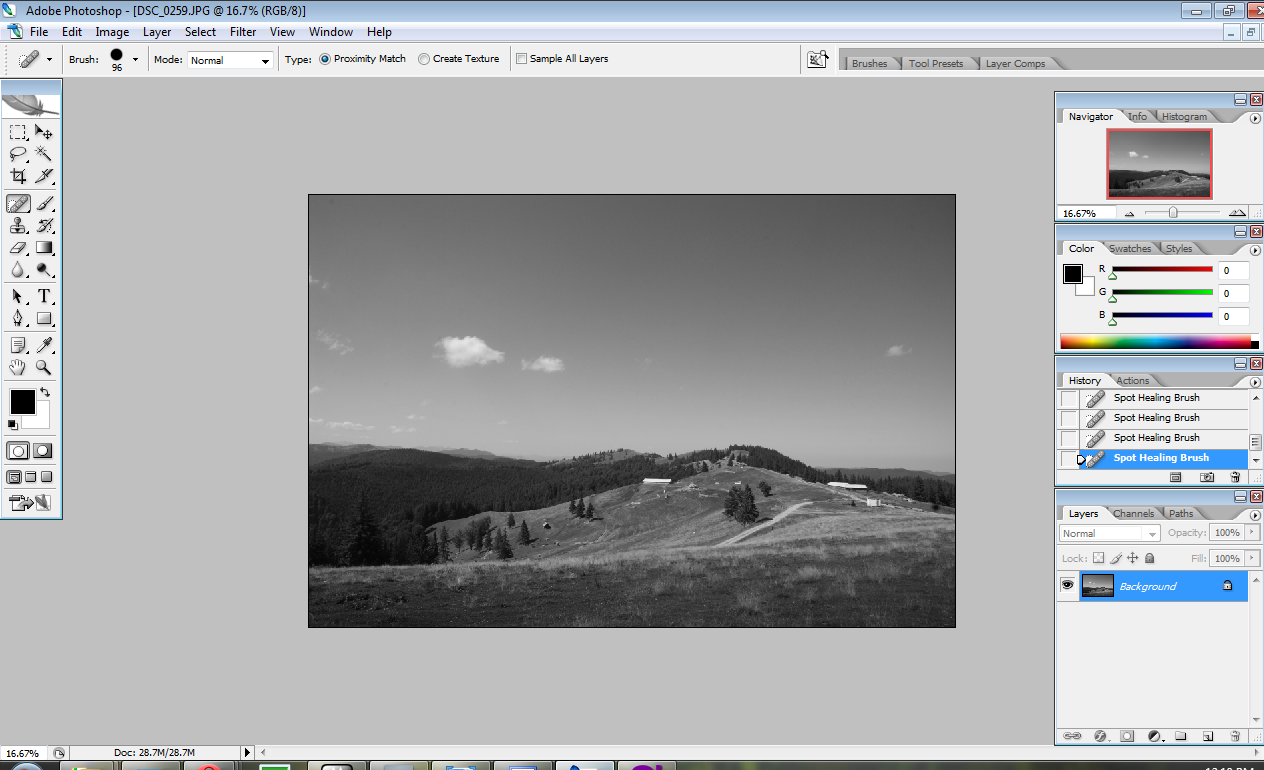
As you can see, we have the default CS2 workspace. I will not do any adjustments before proceeding with the desaturation – this time, we will take care of all the editing after we drained all color out of our picture.

Adobe Photoshop
In order to desaturate your image, you have the plain Desaturate option in the Image > Adjustments menu, but we will not be using that. We will be using the Hue/Saturation submenu that can be found in the same section. (Ctrl+U)

Adobe Photoshop
Now, what you need to understand before proceeding is color management. You see, you cannot simply drain the color from each channel, and expect excellent results – the whole trick with the Hue/Saturation option (or the selective desaturation) is that you are able to bring out what’s best of a certain area based on its color.
For example, if you would like to enhance the sky in black and white, you need to darken (or lighten it), and you will notice that this tool gives you this option. We will not be operating on all the channels at the same time, but we will take each channel at a time – click on the drop-down list and pick each channel as we go through them.
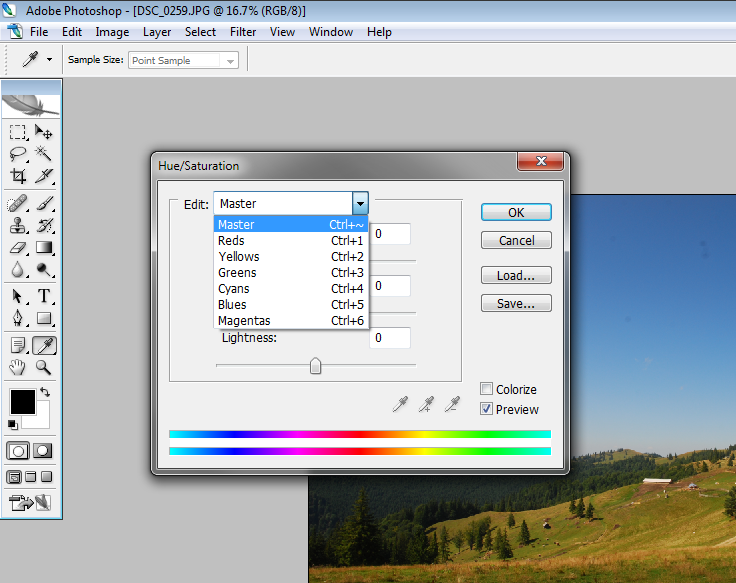
Adobe Photoshop
My image does not use a lot of red, but we’ll start of with that to see what happens. After you click your desired channel, all you have to do is turn the saturation down to minimum, and play around with the lightness bar.
Leave the Hue bar in the middle since otherwise you will end up with quite some interesting colors in your image, and I bet that’s not what you’re looking for right now. I personally drained the red out of my picture and brought a bit more light to it, since I want to create a powerful contrast. After some playing around, here’s what I ended up with:
Black and white photography in Adobe Photoshop
Black and white photography in Adobe Lightroom
We could proceed with adjusting the image here, in CS2, but I find it a lot easier to enhance it in Lightroom, and our personal goal is efficiency above all – therefore, fast and pretty is an excellent option.
Black and white photography in Adobe Lightroom
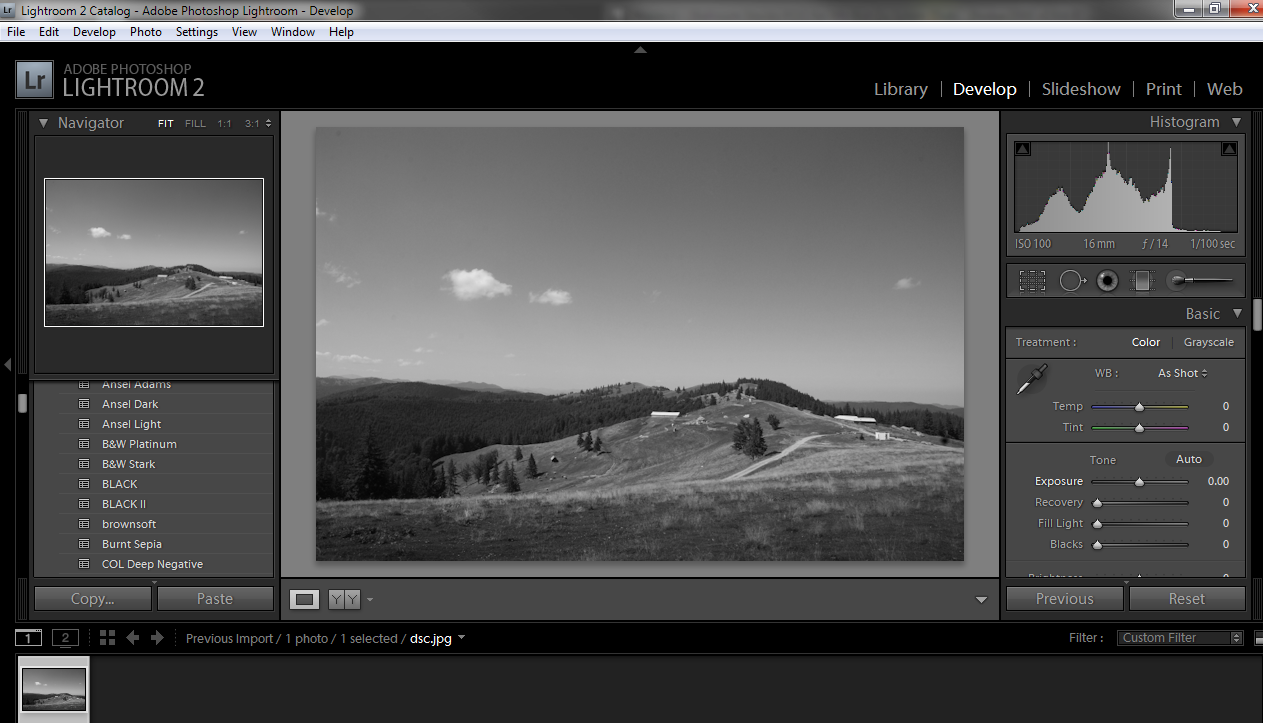
First, we will consider adjusting the Blacks/Lights area, since it will remove a lot of your problems. Careful when adjusting the Blacks – too much black and you will burn your details in the darker areas.

Black and white photography in Adobe Lightroom
As you can see, I went for the Brightness&Contrast settings too and adjusted the image to a bit to highlight the lighter areas and give more depth to the image. Remember, it is essential to give depth to the image from the beginning (remember the Selective Desaturation settings) and proceed with processing afterwards.
I went for the Grad Filter since I wanted to enhance the sky as well – since it was obviously a bit dull. I changed the Grad Filter option from Color to Exposure – make sure you do not go overboard with the darkening of the area – try to keep everything at a natural level since that will make your photograph more interesting (the whole point is to make everything seem real but surreal, not artificial). Here’s what I got:
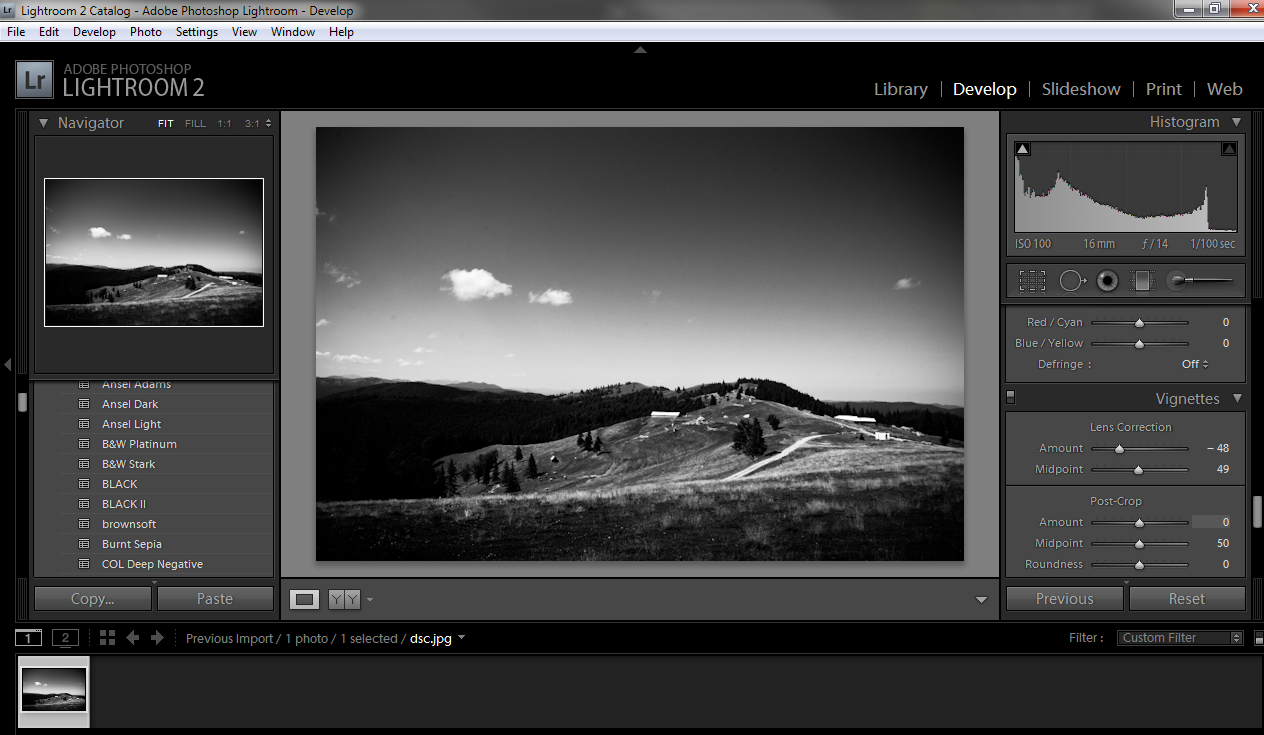
Black and white photography in Adobe Lightroom
It’s obviously a lot more interesting that it used to be, and a lot less dull. You notice the histogram points out some burnt areas (dark areas) – it’s from overusing the Blacks/Contrast sliders. One can overcome that by mastering the Curves graph, and adjusting only the areas that need adjusting, however, it takes more time and experience and this is just a simple beginner’s tutorial.
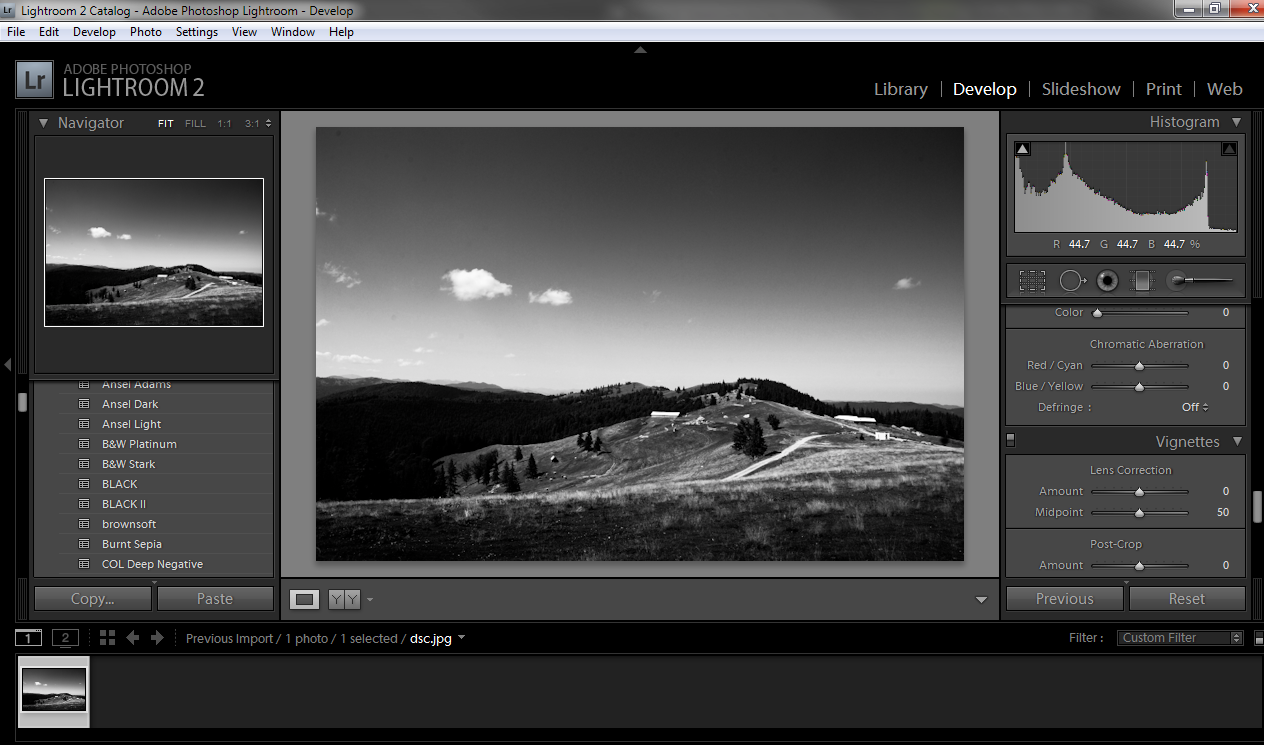
One last touch I thought of before shutting down Lightroom was vignetting. Since it’s a black and white image, bringing the focus towards the center of the image and darkening the edges might prove to be an interesting experiment. Let’s see how that turned out:
Black and white photography in Adobe Lightroom
As usual, avoid going overboard with the setting – just a touch of vignette should be enough to make things more interesting.
So, let’s see how things look now:
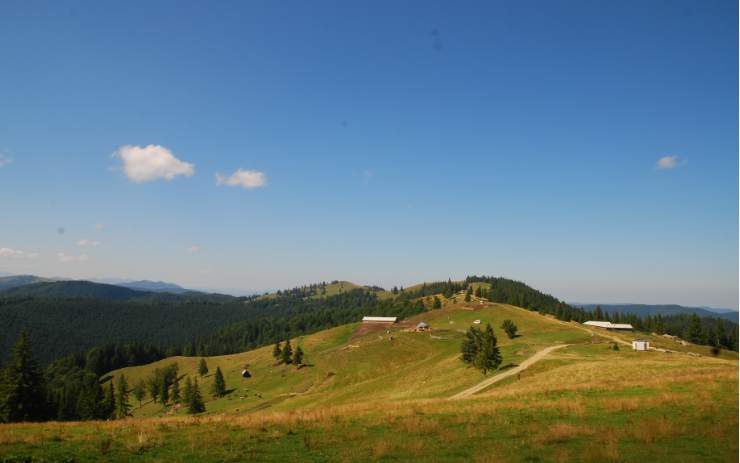
Color photography
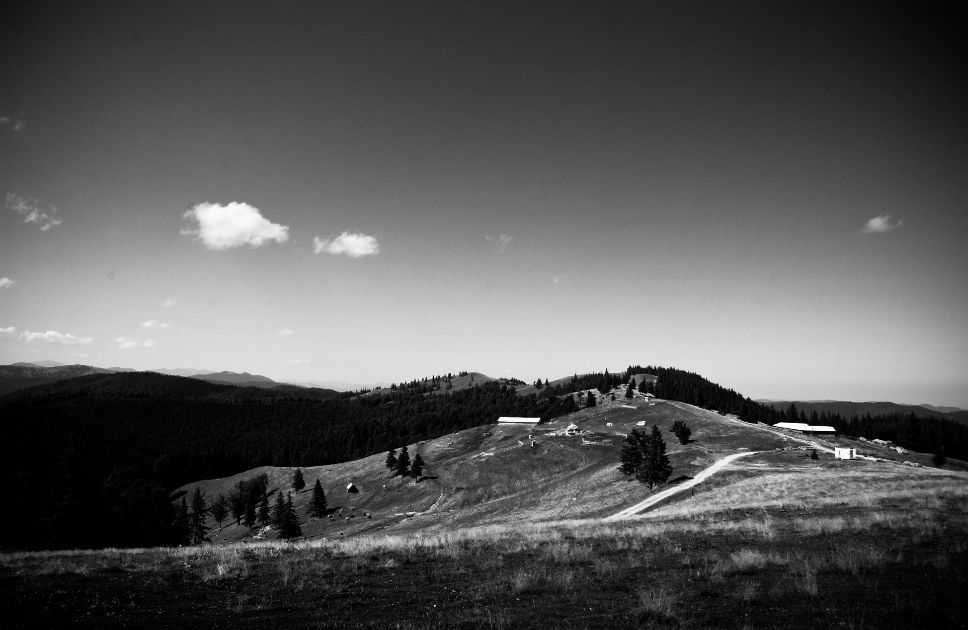
Black and White photography

