How to Manage photos using Picasa
Picasa is the most admired application and is used to upload and share images or online photo albums. Picasa is a free application provided by Google. By using this application user can edit, share, organize, view and manage the photos. Picasa has file tracking and importing features for organizing photos as well as tags and collections for further sorting. Picasa also offers basic photo editing functionalities such as red eye reduction, color enhancement and cropping images. Its additional features include slide shows, image timelines and printing.
Steps to manage photos
You can download a free application of Picasa 2 from picasa.google.com/download
After downloading, install the application to your system. Installing the application may take few minutes depending upon your system configuration. After installing the Picasa application, Double Click on Picasa icon on desktop to run the application.
1. If Picasa is used for the first time then the user will be prompted to scan the entire computer or ‘My Pictures' folder in ‘My Documents'.
User can select the photo(s) to manage or to share using Picasa. Picasa organizes all the photos by date and folder name. Whenever users add photos, Picasa automatically scans it and update the photos in the appropriate folder.
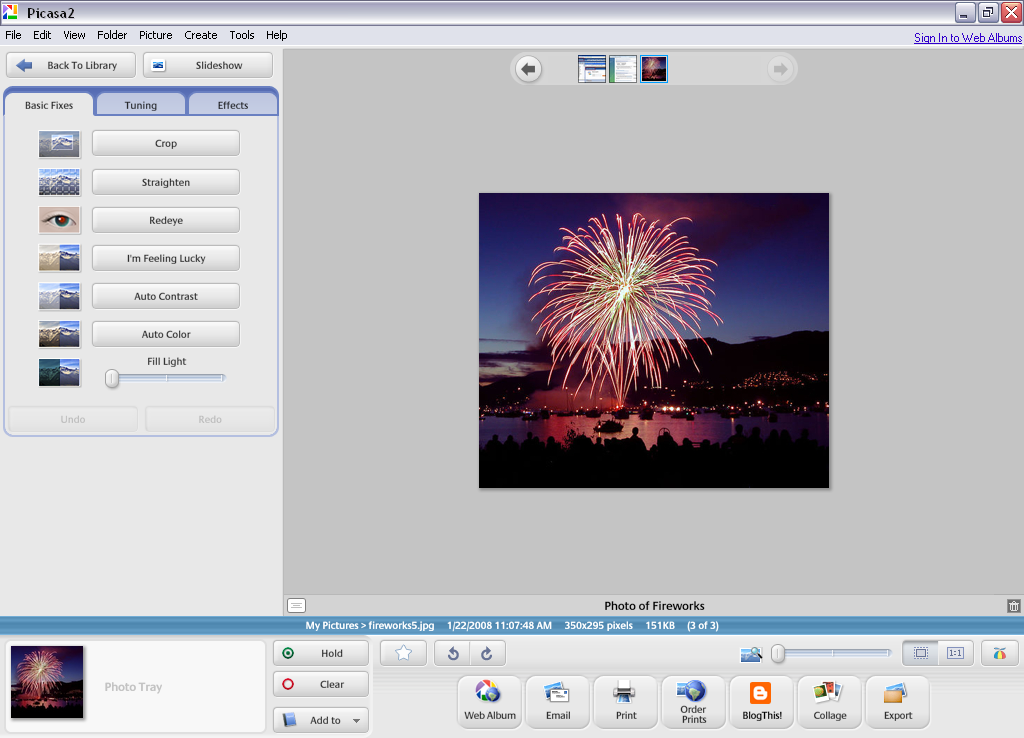
Image 1: Picasa Library - Main Screen
2. When user clicks on a photo, the photo will be displayed on the main screen. Now user can easily add a photo title by typing it at the bottom and can scroll all the photos by clicking on the arrows in the preview bar at the top or can use ‘mouse scroll'.
3. In Picasa there are three tabs/labels for image editing viz., Basic Fixes, Tuning and Effects. Using basic tab user can crop, straighten, remove redeye, Auto contrast, Auto color the image.
4. Using the Tuning tab user can adjust the highlight, shadow and color of the image. User can also use the option fill light, this option fine-tune the additional lighting in dark areas similarly as the camera uses flash during the image capture. Using neutral color picker the gray balance of an image can be adjusted.

Image 2: The Tuning Tab
5. Using Effects tab user can select number of special effects that can be applied to the image such as Glow and Focus effects, Sharpening and Grain effects.
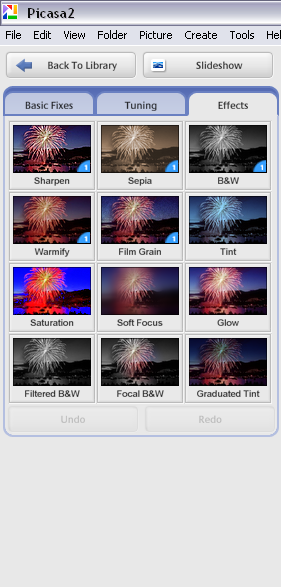
Image 3: The Effects Tab
6. The Toolbar of Picasa appears at the bottom on all the screens. This toolbar includes several options wherein the users can share the web based photo albums, export the photos, email a picture using Picasa, Print the image, add photos to a blog, print several photos etc.
![]()
Image 4: Bottom toolbar
What you should know about Picasa
Additional feature of Picasa includes scanning and managing the video files. There is no need to scan the entire system drives for pictures, user have to only place the pictures into My Picture directory and the rest Picasa does! Picasa works with almost all the image files format which includes RAW and NEF files; however the images can saved or exported only in JPEG formats. The one most important point to ponder is: image if deleted from Picasa will automatically delete the image from system as well.

