How to Upload and Organize Photos with Flickr
Flickr is one of the most popular network places wherein you can share photos with an online community. Users can upload number of photos and tag it with an expressive remark. It has been popular by millions of bloggers. Uploaded Photos can be viewed and shared by other communities of this website. Key features of Flickr; it is the best way to store, search, share and sort your digital memories online. Flickr also organizes your huge collection of photos.
Steps to Work with Flickr
Step 1: Sign Up Process with Flickr
If you are trying to use the Flickr to upload your photos or albums for first time, you need to have an account with the Flickr or yahoo account name. If you are a new user then sign up with free account and make secure login into http://www.Flickr.com. Flickr provides 100MB space to each user.
Step 2: Upload photos with Flickr
After signing into your account, select Upload Photos option to upload your images (gif, Png, jpeg, jpg, etc.) on Flickr easily. You can upload the photos via the web or by using upload tools for Mac and Windows. After uploading your photos you can add title, tag, description, comments, and can apply privacy settings.
Steps 3: How to Organize Photos
If you want to edit your photo on Flickr online community, you need to install Macromedia Flash. After installing this application, Users are allowed to perform following task with Flickr.
Select the Batch Organize Link at the top of the every Flickr page. Organizr of the Flickr is a powerful tool for managing your photos in batches or using sets. Using Flickr Findr you can collective drag your photos into a batch, a set, a group and for removing you photos drag the photos back to the Flickr Findr.
In the Editing part users are allowed to edit the title, description, and tags, Dates and Permissions links. Users can also edit all the metadata of the single photo in one place.
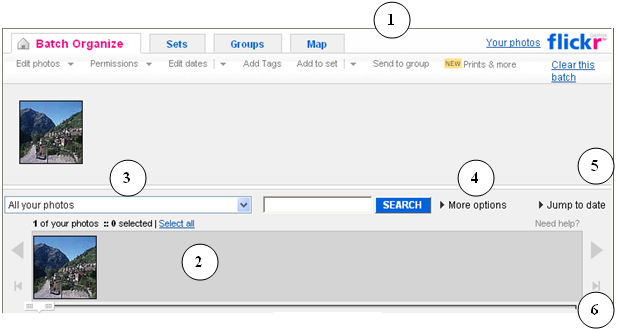
Figure 1: Organizr Window
- The Organizr Toolbar is dynamic and changes as per the tab where in you are working. The drop menu will give you various options to work with your photos (Refer figure 1: for points 1 to 6).
- When users open Organizr windows to organize their photos or albums, the most recently uploaded photos will be visible first, latest photos on the left and older on the right.
- User can filter photos using the drop-down menu in combination with the search box.
- User can use More Options to filter their photos as per their privacy settings. Combining all these things will help the user to find out their photos easily. Users can quickly find their photographs using tag options.
- Click on the Jump to date link located on the right side, to go to a specific date in your photo albums
- Find the previous and Next arrow to navigate photos in Flickr Findr or drag the slider.
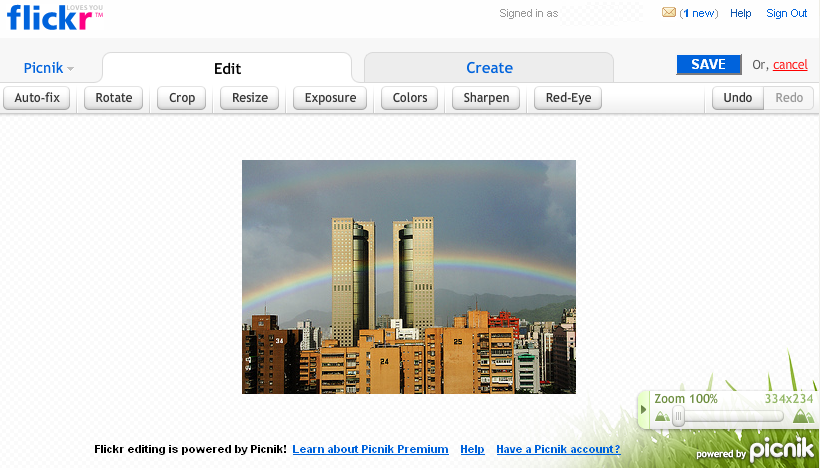
Figure 2: Editing Windows
Steps 4: How to Share Your Photos
Flickr provides with two options viz., private and public image sharing. By default, Private images are visible only to the user; however user can mark and share these photos with friends and/or family. Public images can be viewed by all the members of Flickr community.
Step 5: How to work with Map
To place the photos on map, open Organizr and select the photos from Findr. Now click on the Map tab, click on the find location link or use the zoom tools to browse the location to place your photo on the map. Now you can drag your photo from Flickr Findr and drop into the map.
To remove the photo from the map drag the photo to Findr, removing photo from the map won't delete the photo.

Figure 3: How to work with map
Flickr is one of the best web-based photo management and sharing application. Using this application users can share their photos with the people whom they want to share with.

