How to create Halloween photos
The Halloween is coming up and you should start thinking about some cool effects for your or your friends photos. There is many tutorials about how to create Halloween photo effects using common graphic editors like Adobe Photoshop or Corel Paint Shop Pro Photo X2. However none of them offers special graphic tools for creating Halloween photos like the online photo editor Picnik does. Lets come to look how you can change your photos to get a Halloween atmosphere.
We have a few articles about Picnik here at Photo HowTo. The Picnik is an online graphics/photo editor running in your web browser’s windows from www.picnik.com. The basic effects are available for free, some of the cool filters are available only as a premium service and you can use it after paying two dollars per month.
The newest set of functions, tools and effects is dedicated to Halloween. So I would like to show you how you can use the Picnik to create Halloween photos. Prepare a portrait photography of yourself or your friend and go with me.
Creating Halloween photos online
Go to the www.picnik.com, register and login (I highly recommend) and click the Upload button on its homepage. The open dialog will appear, so use it and upload the photo you have prepared. The upload should be done very quickly as the Picnik works with a local copy of your photo and the upload isn’t real now. You should end up with a window like this:
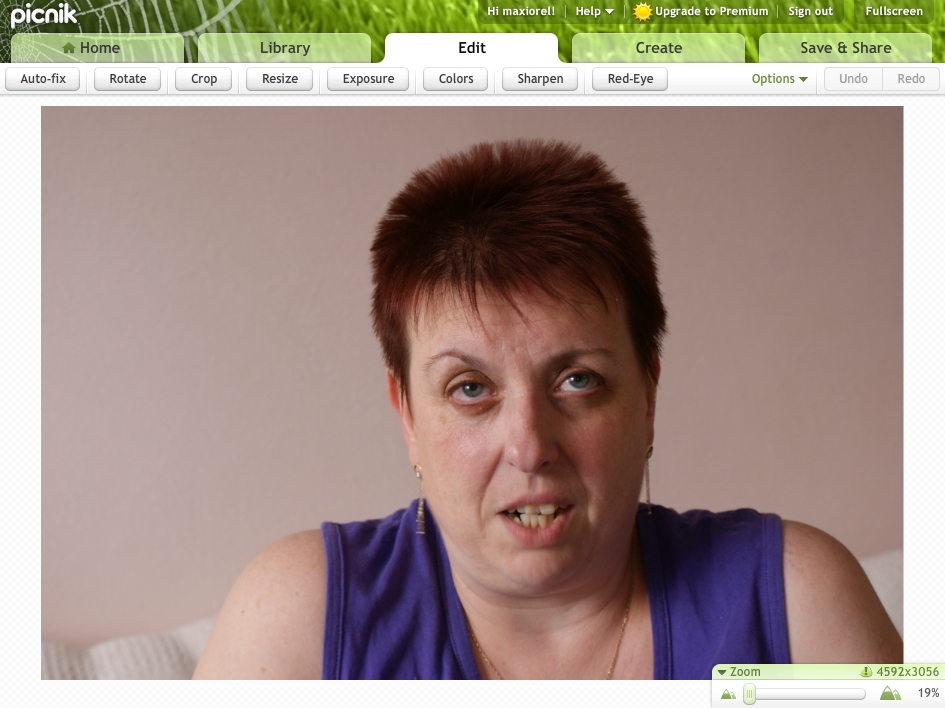
Creating Halloween photos online using Picnik
Now I recommend to click the Auto-fix button or use the Exposure or any other tools on the Edit tab. I tried the Auto-fix in the Exposure tool and that was the result:
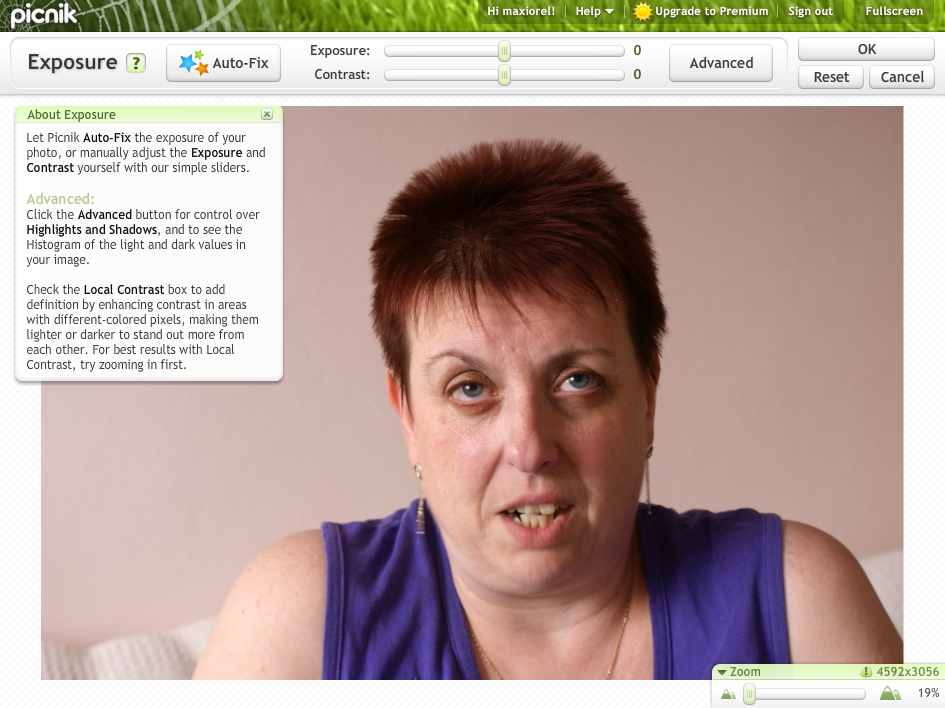
Creating Halloween photos online using Picnik
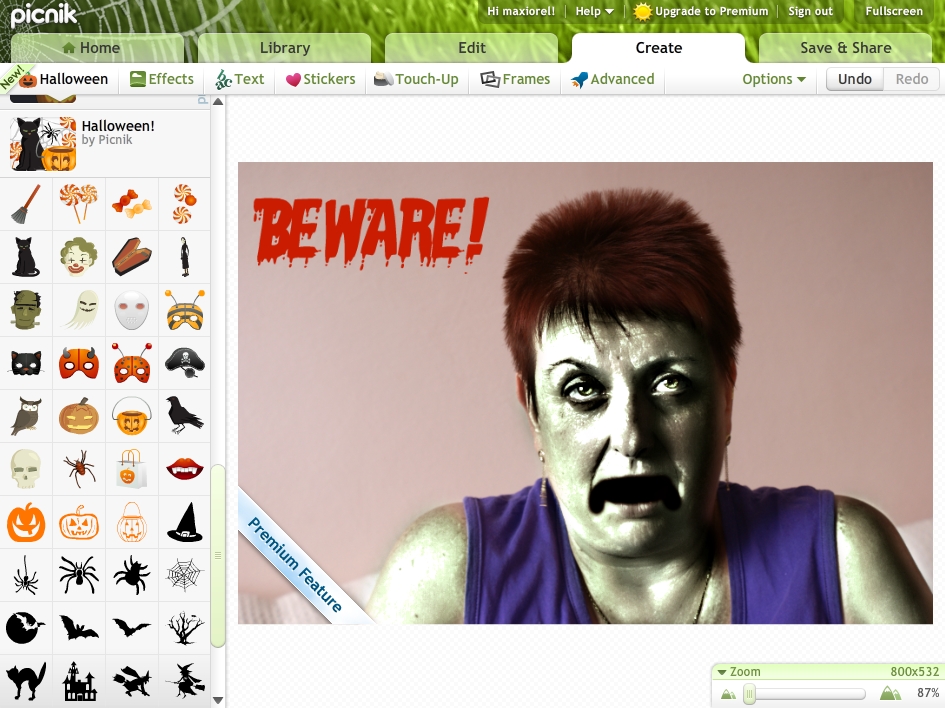
As soon as you will have suitable result for normal photo, you can start changing it to the Halloween look and feel. So click the Create tab and then the Halloween button in the line below. It was automatically selected when I wrote this article by the way.
The Halloween effects can be used the same way as any other effects on this tab. So if you are a familiar Picnik user, you can continue on your own way. If not, go with me. At first, click the Vampire Eyes button. Move the cursor over the eyes and adjust the Brush size using the slider on the left. Now, select one the the eye colors and click on the eye on your photo. Then click the Apply button.
Tip: Use the bottom Zoom slider. Your painting will be more precious then. Use the Eraser button to remove any unnecessary color parts.
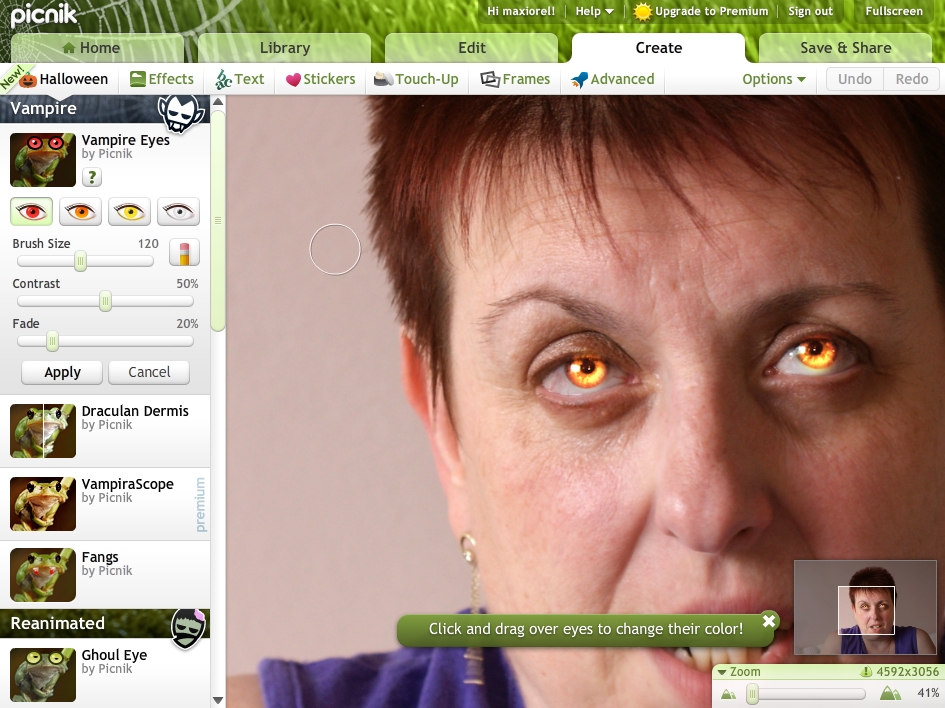
Creating Halloween photos online using Picnik
Now try painting over the skin using the Draculan Dermis tool. Click on this, set the brush size and paint. After that you can change the look of your Halloween photo using the Hungry or Fed button. Then confirm the changes using the Apply button.
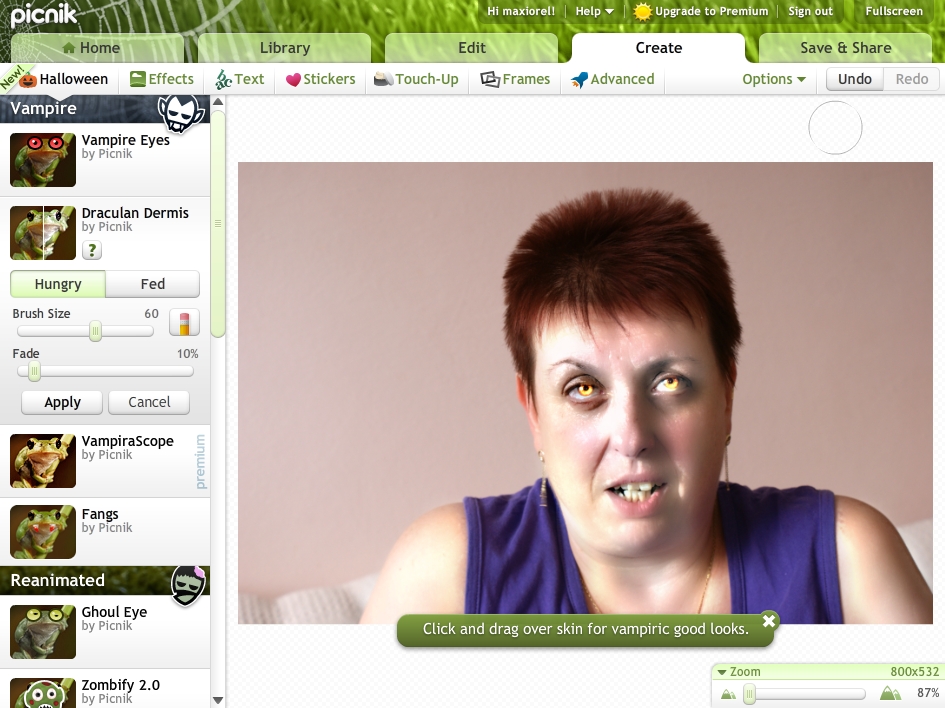
Creating Halloween photos online using Picnik
Fangs are another cool effects. Use it to add bloody or normal vampire fang to the person on your photos. Click the fang, click the photo, drag the fang to its place and change its size dragging the corners. Then click anywhere to the photo.
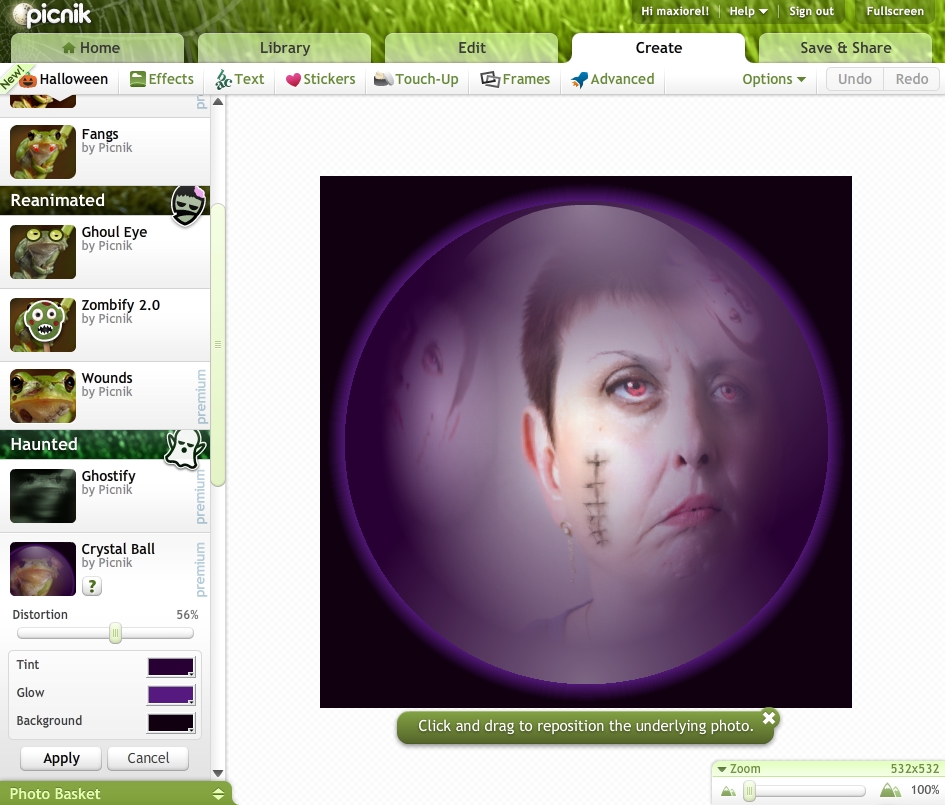
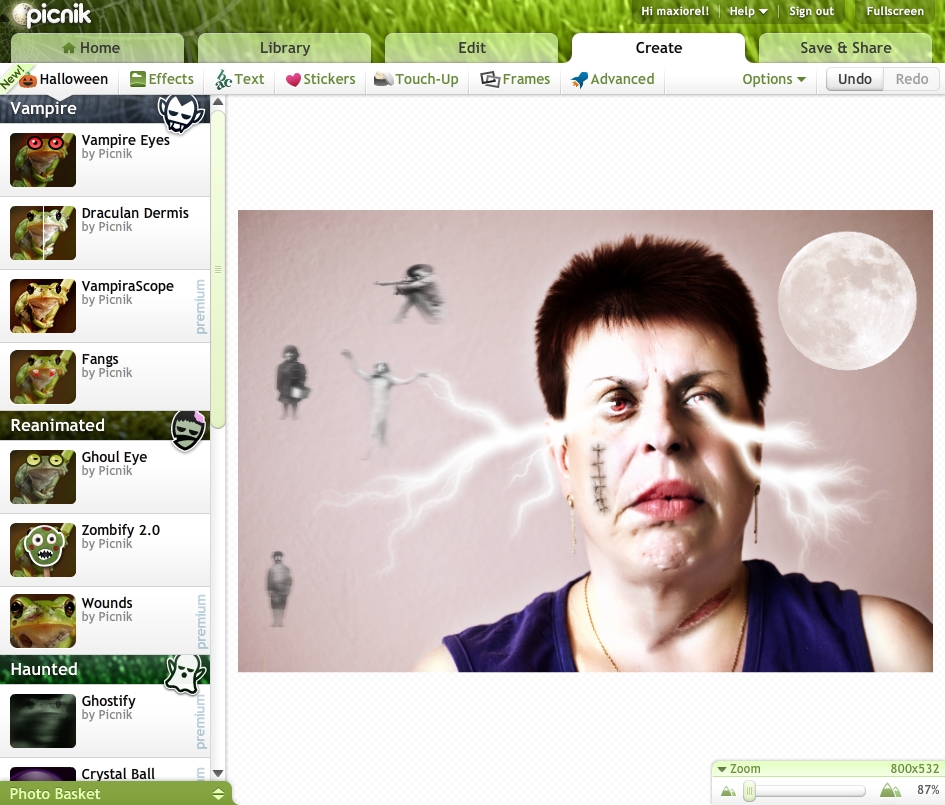
You can continue with a few more effects depending on your feels. The free version of Picnik offers adding Ghoul Eye, Zombify brush, Face Paint, Blood Stains, Halloween cliparts or Halloween style texts. The Premium version offers much more like Wounds, Ghostify, Crystal Ball, Lighting (cool, I like this), Ghosts, OgreVision or Halloween Props.
Please note: Check the Effects button. Those without the Premium label are available for free. The premium labeled buttons can be used for a preview, but you will not be able to confirm the changes unless you are a premium (and paying) subscriber/user.
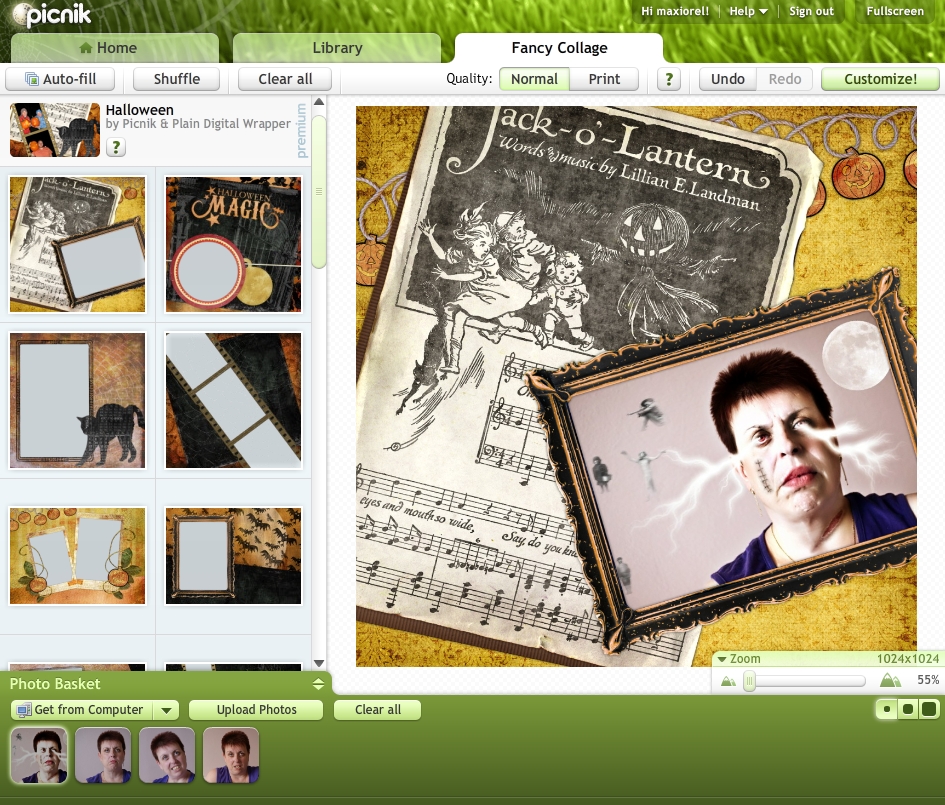
There are some results how your Halloween photos could look:
Creating Halloween photos online using Picnik
Creating Halloween photos online using Picnik
Creating Halloween photos online using Picnik
Creating Halloween photos online using Picnik
After your changes are done go to the Home tab, click the Close photo button and Picnik will allow you to save the photo to the computer or share it using the Flickr, Picasa, Facebook or other social network.
By the way, the cool Halloween effects were the last impulse for me to pay for the premium account at Picnik. And, for the end, I have one more tip. As soon as you will upload your photo, go to Edit tab and Resize it. My experience is that the Picnik crash up sometimes with photos from XX.X megapixel digital cameras.

