Infrared Photography – Uncover The Secrets of IR Photography Right Now
When one sees Infrared Photography, they are immediately drawn to the uniqueness of it and if they are a photographer that has never used infrared photography before, may be interested in knowing the tricks of the trade. There is a certain way to accomplish the unique look of IR photos when shooting the shot and then creating the finished product in the post production of the photograph. Following is a guide to help the fledgling photographer get on their way to creating unique one of kind photographs.
Of course, every photographer worth their salt knows that a photograph captures visible light; however, infrared photography is the ability to catch the visible light in a shot. IR shots come out looking mysterious and very foreign compared to other photographs. To create these distinctive photos there are some things that the photographer will need.
A D-SLR camera that has a lens that is able to use filters is the first requirement for taking infrared shots. A purchase of an IR-filter is also required; this filter allows the wavelengths to filter through. Out of the several IR-filters to choose from the options is basically wavelength range. A good choice for in this brand is the Hoya R72. It is a standard filter and works quit well for this type of photography. There are, of course others to choose from when shopping for this item.

The Tripod
The tripod is one of the most important features to have when attempting to take really great infrared photographs. The D-SLR cameras require stabilization to capture the infrared lights that make these photographs show stopping. When using a slow shutter speed and long exposure, elements used for IR photos, solid stability is important.
Picking The Right Subject
The next step would be to choose the subject of the photograph. Understanding the theory behind catching the invisible infrared light, light that cannot be seen by the naked eye, can help the photographer look for shots that are creative and exceptional. For example, a sky which appears blue to the naked eye will appear black to the infrared lens and camera. Contrast in these shots creates images that step out of the photograph to appear almost multi-dimensional to the viewer. They are particularly incredible when taking landscape shots. The best advice would be to practice until the concept of capturing infrared lights is mastered. It will them be much easier to visualize and capture awesome images that snap off the page at the viewer.
Once the individual understands the concept of IR Photography and what would make a great subject to shoot, it is then important to understand how to photograph the subject. This factor is the tedious part of the IR process. It can be time consuming as well as irritating, especially when using a D-SLR camera. While using this camera is not the most wonderful scenario, the end result will be worth it and fun.
When capturing a shot, try to remember that the odds are nothing will be visible in the viewfinder. It is created to block light and the filter will keep the naked eye from seeing the visible light. Unfortunately, this prevents the photographer from seeing what they are shooting through the frame and being able to tell whether it is in focus or not. This is where setting the tripod comes in. The stability of the tripod helps the photographer to find the shot before the IR filter is attached to the camera.
Light And IR Photography
Visible light and IR light require different distances for focusing in on a shot. This is the annoying part as the camera will need refocused after attaching the IR filter. Again, the viewfinder will be dark because the light is filtered out. With an auto focus, available on newer models, or the older ones with the IR setting, one may be able to drop down the aperture to focus the whole distance.
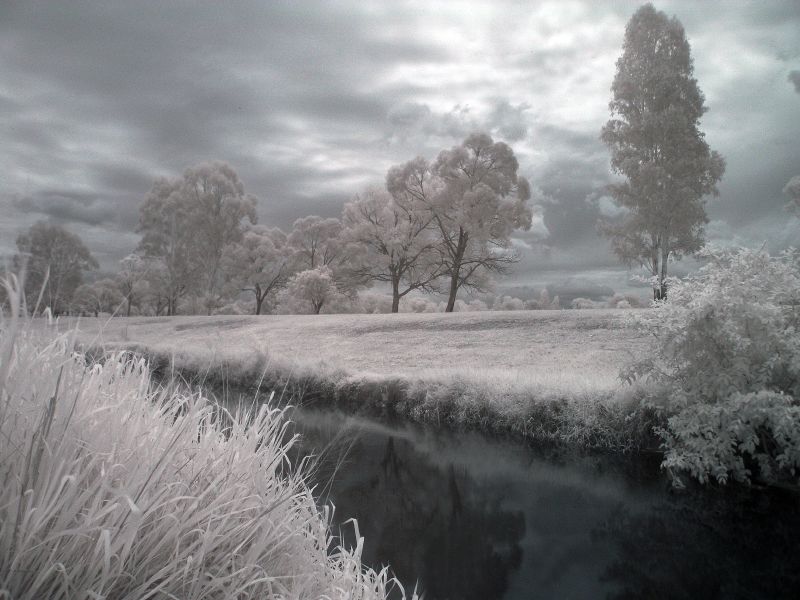
InfraRed Photography
photo by greenplasticdave (source)
Once these steps are completed the photographer is ready to roll. Using the manual exposure meter, an IR photograph requires an exposure time of 10-30 seconds. Unfortunately the length of time that exposure requires creates a risk for blur due to motion and noise pollution. Long exposures create a greater noise level running a higher risk, a known rule amongst photographers. To keep noise level to a minimal it is recommended that the least ISO setting be used.
Adjusting Your Images
The finished product will be decided on the quality of the camera and filter and how the IR light comes through. Filters like the Hoya R72 create results that are red/magenta. These heavily tinted images are actually “false colors” and Photoshop can clean these shots up.
Using Channel Mixer in Photoshop, open up the photo and generate a new adjustment layer. Channel Mixer controls RED, BLUE and GREEN. Swap the blue and red channels to create a good mix.
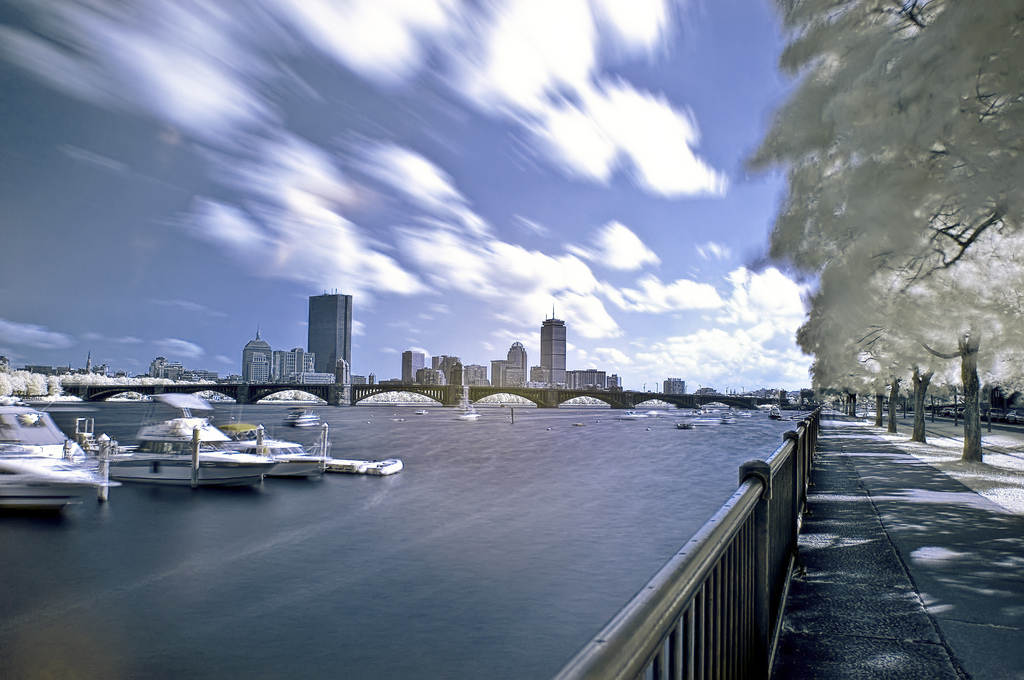
InfraRed Photography
photo by Werner Kunz (source)
The steps in this process require one to choose Red and drop the setting to 0% while raising the Blue to 100%. Then vice versa, also, experiment with the Green channel to mix the color for the scenery.
This manipulation of the colors should remove the deep red/magenta tint from the shot, and hopefully create a striking shot that one can live with. Levels and Curve settings can also be manipulated; hitting Auto will display the outcome.
During Post Production, just recall that it is trial and error. What works for one photograph may not work for the next one. Trial and error is the way to create and learn what works best and how to manipulate the colors to create that one of a kind shot. Like anything else, Infrared Photography takes practice and more practice to master the technique. Beginners need to remember to persevere. This procedure is not one that can be mastered immediately but requires practice and understanding of invisible lighting. But in the end, it will be worth learning, and the pay off will be incredible one of a kind photographs.

