Graduated Neutral Density Filters - How And When Should You Use Them
In photography, we learn to take advantage of whatever means we can in order to obtain the desired results. And filters are just some of the most interesting tools you can use to enhance the result. A frequent question that occurs between landscape photographers is "Did you use a filter when taking this photo" and the more popular "What filter did you use?".
The point of using filters in general is that it gives you the chance of increasing colors and tones and helps you capture a more spectacular light. There are certain filters that can be simulated in Adobe Photoshop or Adobe Lightroom, however, you have to understand that there is a limit to how good those simulations can be.
More precisely, this article is about gradual filters and how they can enhance your photographs. You see, Adobe Lightroom comes with its own Gradual Filter that's very easy to handle, but in the end, the effect can barely be compared with what the filter can do when you're out in the field.
When are Gradual ND Filters Useful?
Think about it, most landscapes you take during the day have the following problem: the sky is overexposed, and if you adjust your exposure to match that of the sky, you will end up having an incredible sky, and a rather undexposed over-all photography - that will take out most of the beauty of your image, since you will not be able to deliver a high-contrasting landscape with a beautiful sky without having to spend a lot of time post-processing it.
Graduated NDs, or commonly known as grads are filters that have the bottom side clear, while the upper side is slightly more opaque (depending on the type of gradual ND you go for). Now, some filters provide a smooth transition between areas, while some of them provide an abrupt one.
Here's how a gradual ND filter works
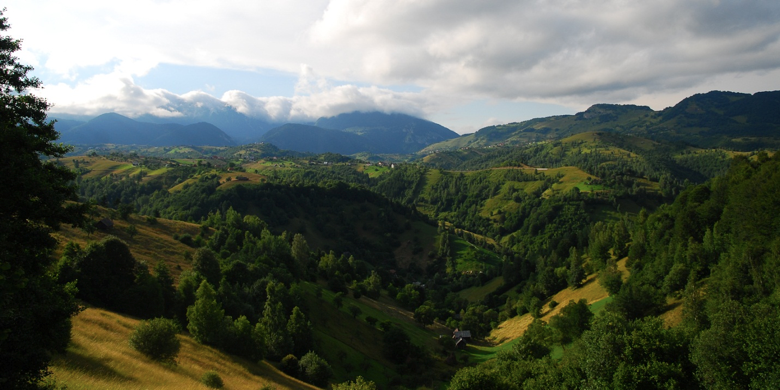
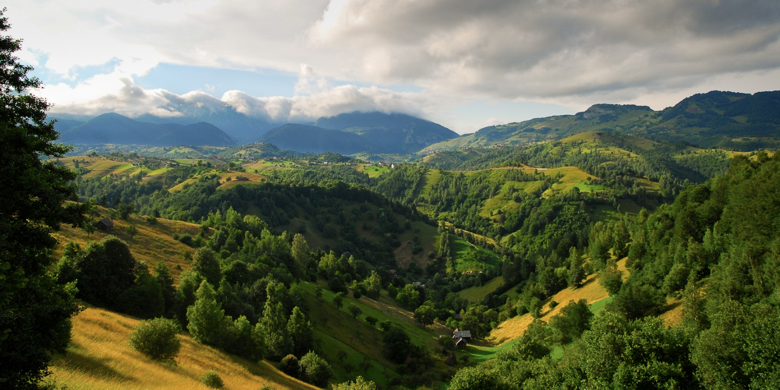
I picked this photo in particular since it allowed me to show you that in some cases, burnt areas need special care (in this case, a darker ND filter might have helped more). You see, there is a certain difference between the two - not only that the second picture has better lighting, you can also see a clear difference between colors and shades and the overall mood of the photograph has changed as well.
What Kind Of ND Filter Should You Buy?
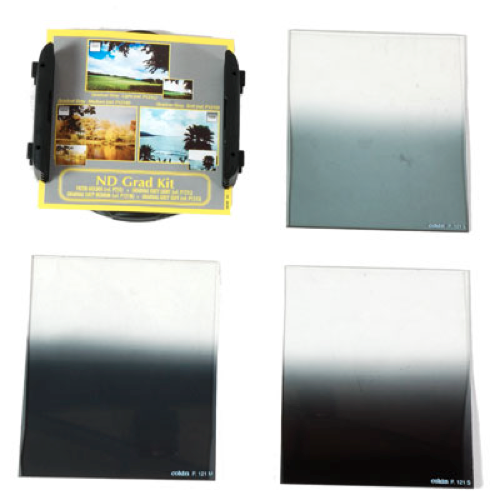
Obviously, there's more than one of everything. In this case, you can opt for filter systems that provide square filters similar to the ones in the image above, or you can opt for a simpler filter - the one that simply is attached to the front of your lens and you can rotate to filter the part of the image that requires it more. You can also attach two filters at the same time in order to obtain a more powerful effect.
Whether you go and buy a Cokin Filtering system (the one in the image above) or you go for the simple ones, you have to understand what each of them has to offer. When working with certain systems, you have to understand that they are harder to carry around so they might prove to be extra luggage.
When Should You Use These Graduated Filters?
We discussed what they do, and which ones to buy, however, let us also discuss when to use them. First of all, the main problem that ND filters help with is when a certain scene has a contrast range that will exceed your typical dynamic range. Either way, for better photographs and staggering effects you will end up using the ND graduated filter a lot more often than when it is truly necessary.
You will also have to pick the right filter for a certain scene - while this is indeed a trial and error kind of question, it is wise to have all three graduated filter stops available - this means having them in one, two or three stops. While this might be a bit more expensive than you're willing to spend on a filter set, you will notice that it is incredibly useful to proceed in this manner, as it will give you the necessary flexibility in the field.
Good luck!

