A few words about Street photography
Here are some hints to help you look at the urban landscape with photographer’s eyes, and to help you compose interesting shots using what is around you. You don’t need to go outside the city to find scenes worthy of photographing – with a bit of thought and a little skill, even an amateur photographer can take good street shots. There are plenty of things to photograph in the city, and with some imagination you can turn mundane scenes into something special.
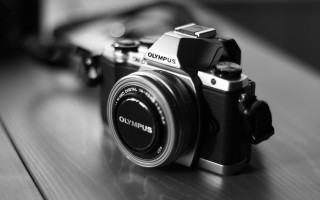
Street photography can be difficult, though, especially when you try to capture a fleeting scene. Often you don’t have time to think about the composition of a shot, the technical aspects of what settings your camera should be on, or what angles will give you the best result. A quality point and shoot camera will give you a good result, and it is less conspicuous than a DSLR camera – an advantage when you are after candid shots of people. If you have assessed the light and thought about what shots you are likely to be taking, you should be able to have your camera preset so you don’t have to keep changing your settings, or risk losing a good shot because you are too busy fiddling with the camera.
Street scenes are often filled with objects, making it difficult to highlight in the finished photo what your eye discerned as the subject. Setting your camera at a lower f-stop, giving you a shallower field depth can assist with this problem. Many subjects you may want to take shots of may move too quickly for you to capture the shot you were after without blurring - fast exposure is the best you can do, but will not help at night, when a higher ISO may be the answer rather than a quick shutter speed. If you find using the manual focus on your camera too slow, you may find automatic will do the trick.
Don’t shoot too small. If you take wide shots which you can crop later if necessary, you will have given yourself more flexibility in your final composition – you may even decide to change the focus of the whole picture! If you are less fussy about zooming in and out, you will have more time to take the shot, or to take several shots.
There are some practical aspects of street photography which need to be covered before you start. Most importantly, you need to be aware of laws governing photography of people (and sometimes of property), and to have worked out how you will approach potential subjects. It may pay to scout out possible locations for your photography, with some ideas about settings and angles, making sure you take notes as you go and perhaps a map.
Lighting is essential in street photography, so you should visit your planned locations at different times so you know what time will give you the best effect. This is a nuisance, but could be the difference between a stunning shot and an ordinary shot.
Have a look for places you can get higher or lower than the street to give a different edge to your shots. If you are photographing streets or buildings, try to shoot diagonally, which draws the eye along the angle and gives a more dynamic aspect. Repetition of a theme, such as lampposts, will have the same effect. Look for effects such as shadows, shapes which stand out, sudden splashes of colour, reflections, textures – study your subject. Photograph the same thing over again under different conditions, even bad weather. Be aware of what activity to expect on the street at different times; if you don’t want people in the shot you will need to pick your time. Experiment with lenses and camera settings.
Shooting on the street is rewarding once you have practiced and gained certain skills, not the least of which is keen observation and an awareness of what will make a great picture. Some final advice: wear good shoes if you plan on walking, be careful of your equipment (it is easily stolen while you are distracted) and don’t be so wrapped up in what you are doing than you are not aware of what is happening around you.


