Creating Beautiful 360 Degree Panoramas
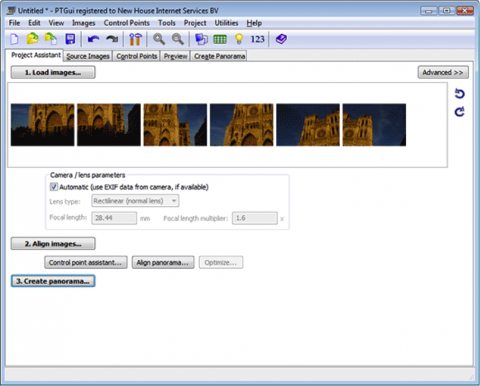
It is possible to create seamless 360 degree panoramas using digital images and specialized stitching programmes such as PTGui or Photoshop. Most vendors include panorama-making software in the package when you buy their cameras. There are several steps to making excellent panoramas and it is a good idea to use expert software and equipment.
In theory making 360° panoramas is very easy – you simply stand in one place and take overlapping photos as you turn in a circle. Then you add the photos to your software and it stitches them together into one seamless image.
In reality it’s not so simple, because no matter how hard to try, your hands will move, even slightly and this can make the stitching process uneven. This will result in the resulting image being cropped, leaving only the middle part, which will ruin the photo. If you want excellent panoramas you should use a specialized tripod head. One of the best is the Bogen 3415 Panorama Head and QTVR System, which has three components.
The top section is a centring mount that is vital for panoramas. The rotation axis should be centred on the lens to avoid parallax problems and therefore stitching complications. The Bogen tripod head centring mount permits the setting and locking into position for various camera and lens combinations and also fixes the camera in a vertical position for optimal vertical exposure.
The middle part is the rotating head, which has a lot of settings to allow individual rotation angles between images. The lower section includes the Manfrotto Levelling Base with a built-in spirit level so that you can ensure that your camera is properly levelled for each photo and make fine adjustments of +/-5%.
Before starting to take the photos for your panorama, you shouldn’t forget to put the exposure onto the manual mode. Set the exposure for the most important part of your intended panorama and use the same for each photo, with the while balance matching the light source. If you forget and leave the setting on “Auto” there will be colour changes between each image, and do make sure to use a lens shade, if you have one, when turning into the sun.
Once you have taken your photos, the next step is stitching them using Photoshop Layer Masks. Start by setting up an Action so that you can rotate and make any changes to the colour balance or exposure.
Step two is to open a new canvas large enough for all your photos. Open the Layers palette is open, then drag images N°1 and 2 onto your canvas. They will overlap and be cropped at the end. Slide the second image over the other until they are more-or-less aligned and have a look at the layers palette. There should be three layers: the Background, Layer 1 (the first photo) and Layer 2 (the second photo). If you want to change any layer without touching the others, simply click on it in the Layers palette.
Now select Layer 2. In the top right-hand corner of the palette you will see the opacity percentage. Lower the percentage to about 40 or 45%, until you can see Layer 1 and then using the Move option you can better align the photos. Once this is done, return the opacity to 100%.
The two photos still aren’t completely aligned and you will see a noticeable seam where they overlap. This takes us to step three, creating a Layer Mask to smooth the seam out and merge the layers. Select the Layer Mask symbol (second to the left at the bottom of the palette) to create a mask on Layer 2 (where the two images now are). When making modifications to the photo remember that the Layer Mask will always be in the superior Layer box.
Now select the Paintbrush option and set the foreground colour to black. Choose a brush size and paint on the Layer Mask, which as you cover it with black, will become transparent, exposing the layer underneath. As you paint over the seam, it will spread and the layers will unify. Once you have finished, change the foreground colour to white and the Layer Mask will become opaque.
Repeat these steps, adding image by image until your panorama is complete and ready for cropping. If there is any exposure inconsistencies between the images, select the image portion you want to tweak in the left-hand box and modify it until it matches the others. This done, flatten the image using the Layer/Flatten image tool. Now you can make any final colour, sharpening or tone modifications to your panorama before saving it as a TIFF.
A very good, easy programme for making a rotating Quick Time film for the web is CubicConverter for Mac and the GoCubic for Windows. Using this software will allow you to convert regular panoramas into cylindrical films and spherical panoramas into equirectangular films.
Start off by changing the panorama size to 2000 pixels horizontally and save as JPEG. Then simply drag the file into CubicConverter, set your compression, size of film window and starting position in the “Movie” page and select the “Convert” button. When the conversion is finished click on the “Save As” button and you’re done.


